Instructions on how to factory reset and reconfigure the XIAOMI Mi Router RA80/RA82 AX3000 Wireless Routers
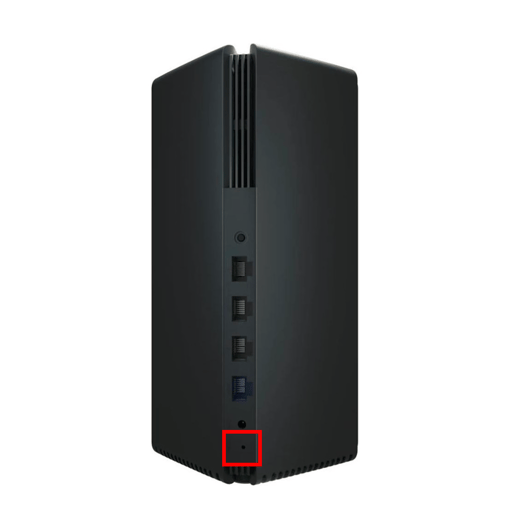
1) Please remove the Ethernet Cable from the Blue WAN Port on the back of the router

2) Using something small like a paperclip or toothpick, press and hold it for 10 seconds, or until the "System" LED turns off.

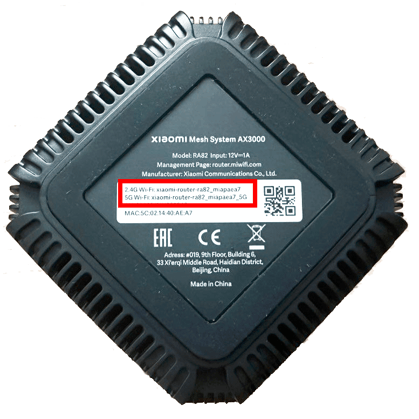
3) On a laptop, desktop, mobile or tablet, please reconnect to the Wi-Fi network. If you have a computer with a wired connection, you may skip this step.
The name of the Wi-Fi network will be written on a sticker on the base of the router.

4) If you are connecting using a Phone or Tablet, it will automatically take you to the Mi Router setup page.
If you are using a computer, you will need to open a web browser and navigate to
router.miwifi.com

5) Please input your Country or Region, then agree to the User Agreement and select "Try it now"

6) Configure your new Administrator password. This password can be anything you like, but must conform to the minimum password requirements Note: This password is used to access the router settings to change details like your Wi-Fi name and password.

7) The router will then indicate that no cable is connected - this is fine and you need to scroll down and select "Continue setup without connecting a network cable"

8) Select your Connection Type from the list provided

8a) If prompted, select None under "Additional ISP Settings"

8b) For PPPoE connections, please enter the Username and Password we supplied you

9) You can now rename your Wi-Fi Network, and set a password. This will be the name of the network you select when connecting new devices
Note: Your password must be a minimum of 8 Characters

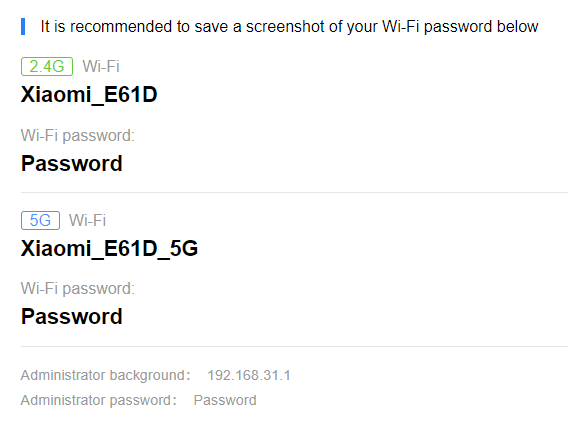
10) When set-up is complete, you will be prompted with a confirmation of the Wi-Fi network name and password you have selected - Please make a note of it.

11) Reconnect the Ethernet Cable to the Blue WAN port on the back of the router, then restart your router by removing the power for 5 seconds and then reconnecting it.

12) Join the Wi-Fi using the network name and password you created in Step 8, and your connection should now be active.
