- Connect your Router
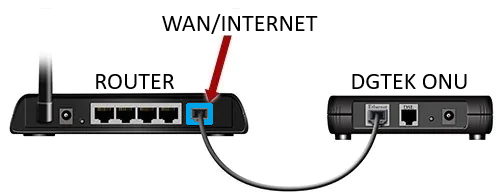
- For Pineapple Net FTTP Connections
- Connect one end of the Ethernet Cable to the WAN or Internet Port of your Wireless Router
- Connect the other end of the Ethernet Cable to the Ethernet Port of your DGtek ONU
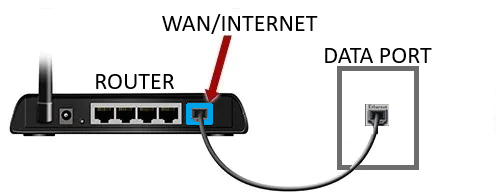
- For Pineapple Net FTTB Connections
- Connect one end of the Ethernet Cable to the WAN or Internet Port of your Wireless Router
- Connect the other end of the Ethernet Cable to the data port in your apartment
- The active data port will usually have a DGtek sticker on it to indicate the correct port
- The active data port will usually have a DGtek sticker on it to indicate the correct port
- For Pineapple Net FTTP Connections
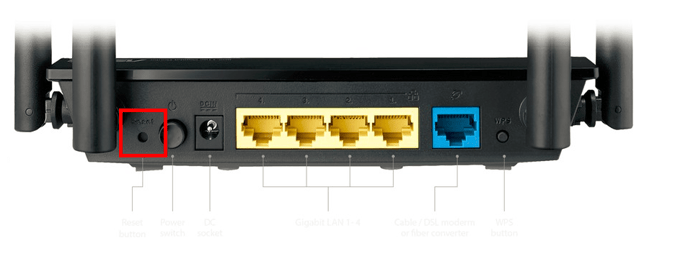
- Reset your Router
- Using a small object such as a paperclip or toothpick, press and hold the Reset button on the back of the router for at least 10 seconds, then release it.
- Using a small object such as a paperclip or toothpick, press and hold the Reset button on the back of the router for at least 10 seconds, then release it.
- Connect to the Wi-Fi Network
- On a laptop, desktop, mobile or tablet, please reconnect to the Wi-Fi network. The name of the Wi-Fi network is located on a sticker on the base or back of the router.
- These will be labelled “SSID” and “Password”
- These will be labelled “SSID” and “Password”
- On a laptop, desktop, mobile or tablet, please reconnect to the Wi-Fi network. The name of the Wi-Fi network is located on a sticker on the base or back of the router.
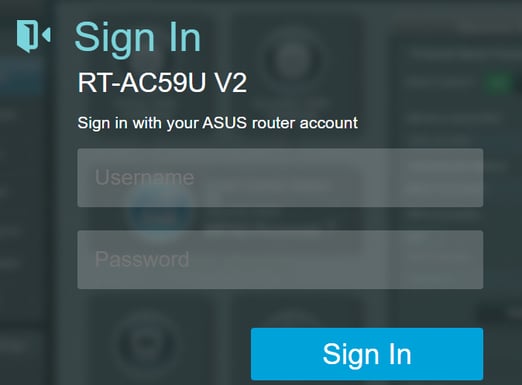
- Access Router management page
- Once you have connected to your Router's WiFi, open a web browser and type the following into the address bar and press enter:
- http://router.asus.com
- Enter the Default Username and Password for the router. The default username name and password are located on the sticker on the base, or back of the router.
- Once you have connected to your Router's WiFi, open a web browser and type the following into the address bar and press enter:
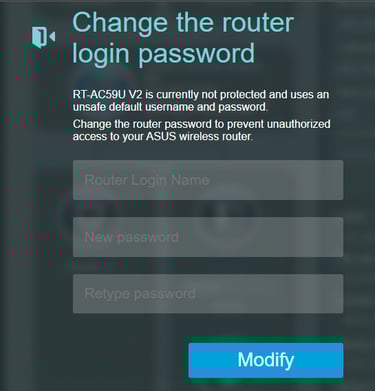
- Update Admin Username and Password
- You will now need to create a new Username and Password which will replace the default with more secure details
- You will now need to create a new Username and Password which will replace the default with more secure details
- Configure your Connection
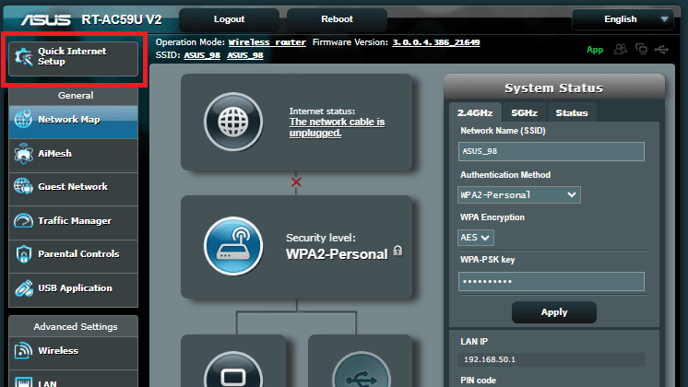
- In the top left hand side of the router Home Page, select the option “Quick Internet Setup”
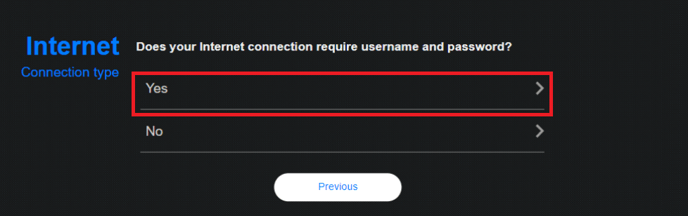
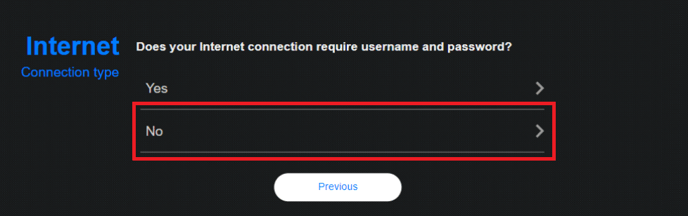
- The Setup will ask "Does your Internet connection require a username and password?
- If your connection type is PPPoE
- Click Yes
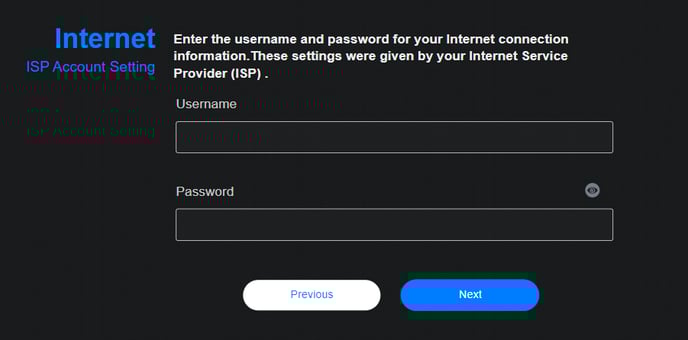
- Select PPPoE

- Enter your Pineapple Net Username and Password then click Next
- Click Yes
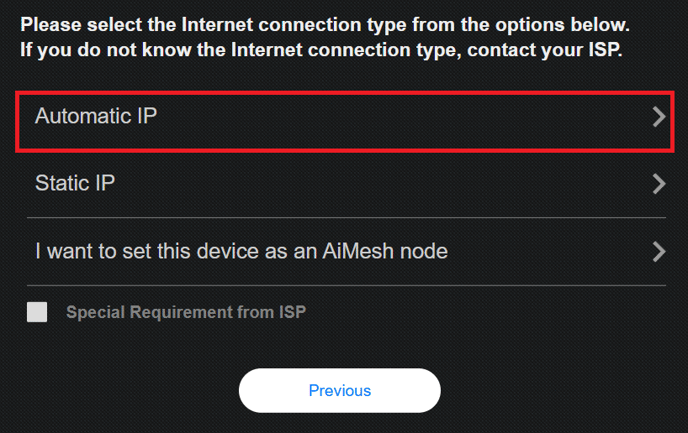
- If your connection type is DHCP or Dynamic IP
- Click No
- Select Automatic IP
- Click No
- If your connection type is PPPoE
- In the top left hand side of the router Home Page, select the option “Quick Internet Setup”
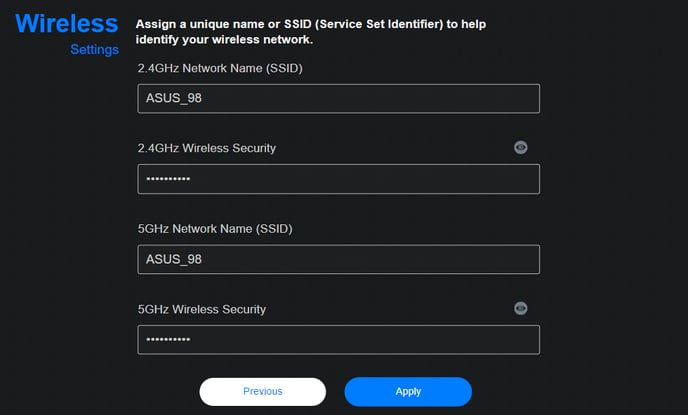
- Setup your Wi-Fi Network
- Set-up your WiFi Networks by entering a new SSID and Password for each of your Networks (2.4GHz and 5GHz). You may leave the current data unchanged if you prefer
- Set-up your WiFi Networks by entering a new SSID and Password for each of your Networks (2.4GHz and 5GHz). You may leave the current data unchanged if you prefer
- Apply Settings
- Click Apply
- Your connection details will save, and your router should connect to the internet within the next 1-2 minutes.
- If your connection does not establish within 1-2 minutes, power off the router for 5 minutes, then reconnect the power.
- Click Apply
English